WordPress is the content management system that is used as the underlying software platform for a lot of blogs, including this one. When I decided to start the Retibus Blog, I briefly considered rolling out my own PHP-based solution in order to add a blog section to the website. I quickly dismissed that idea, though. It would have been a lot of work to get most of the features that people expect from blogs, like enabling readers to register as users, add comments, make permalinks available for the individual posts and so on. I then decided that it would be much more convenient not to re-invent the wheel and leave all the dirty work in the hands of WordPress. That was a wise decision. The WordPress software is very powerful and elegant, and makes it very easy to administer a blog. However, while it is quite easy to download the latest version, install it and set up a website wholly powered by WordPress, things are not that simple if you want to integrate a WordPress blog within an existing website, keeping a uniform look and feel across the blog and non-blog parts of the site. In this post I’m going to explain a technique to seamlessly integrate a blog powered by WordPress into an existing website.
1. Alternative approaches
There are actually three possible approaches if you want to add a WordPress-powered blog to an existing site:
- Rebuild the whole site using WordPress. WordPress lets you add custom pages where you can replicate the contents of the original site.
- Write your own PHP code in order to set up a WordPress loop within the existing site.
- Tweak a WordPress theme so that the blog page mimics the look and feel of the rest of the site.
The problem with the first approach is that it affects the whole site. If you’re building a new site from scratch, it may make sense to make it fully managed by WordPress, but if you just want to add a ‘Blog’ or ‘News’ section while leaving the rest unchanged, porting everything to WordPress pages may be a high price to pay. My decision was not to go that way, and use WordPress only for the ‘Blog’ section. This leaves us with the two other options.
The second option consists in doing everything by hand. The WordPress documentation has an article which explains the basic facts about how the WordPress loop works. This approach gives you a lot of flexibility. By calling functions such as get_posts, query_posts and have_posts you can retrieve the posts as plain text and use your HTML, CSS and PHP skills to format them as you wish. But it should go without saying that this approach is not for the faint-hearted. After you manage to display some posts, you will find that you need to provide a ‘Comments’ section, and then the permalinks, and then a way to navigate through the posts, and then a 404 error page… After a lot of time and effort, you’ll be the PHP programmer of the month, but you’ll probably still be struggling with the odd glitch here and there.
The third option is more of a top-down approach, where we begin by setting up an ordinary WordPress blog and then modify its active theme to match the rest of the site. This is in my opinion the easiest way of integrating a WordPress blog within an existing website, and it is how the Retibus Blog itself has been implemented. The remainder of this post explains how to do this.
2. The basic steps
Let us suppose that we have a site www.example.com. We now want to add a new ‘Blog’ section powered by WordPress. We will need to follow the next steps.
1. Create a dummyblog subdirectory and a dummyblog.html file that matches the general layout of the site. In this explanation I will assume that the file is HTML and that there is a separate dummyblog.css file for the styles, but everything should be the same if the skeleton file is a PHP file or if the styles are inlined.
2. In the dummyblog.html file add a div element where you would like the blog to appear, like this:
<div class="my-website-blog-area">Blog goes here.</div>
Add a new CSS class to the dummyblog.css file, something like this:
.my-website-blog-area

{

background-color:red;

}
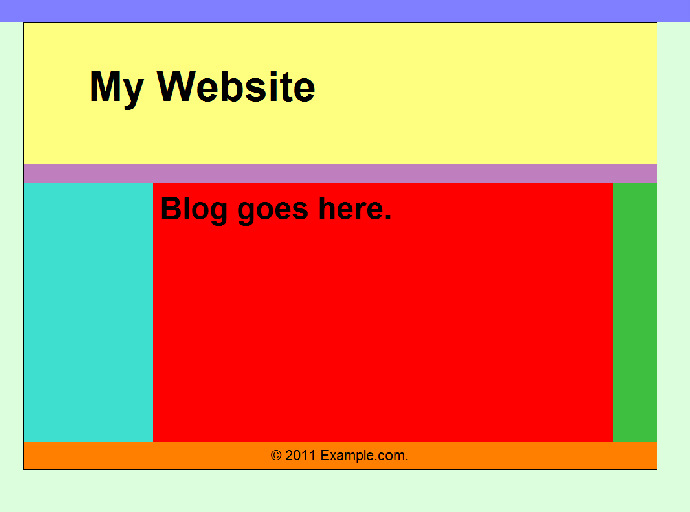
Now if you save this and check the www.example.com/dummyblog/dummyblog.html file, you should have a red area where the blog will be embedded, as shown in the picture below.
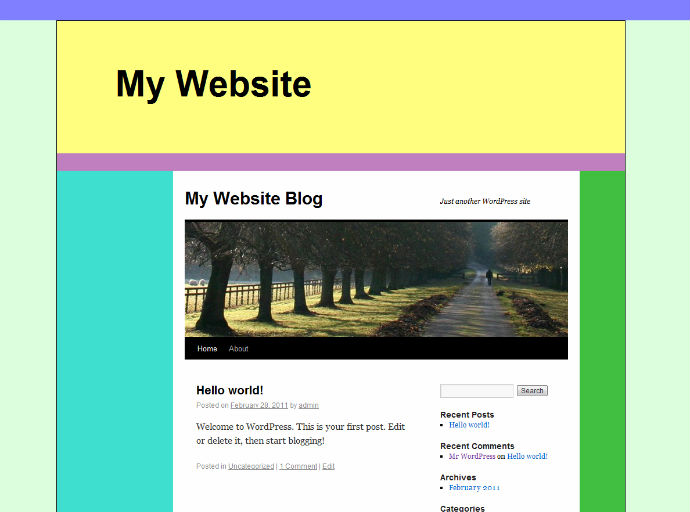
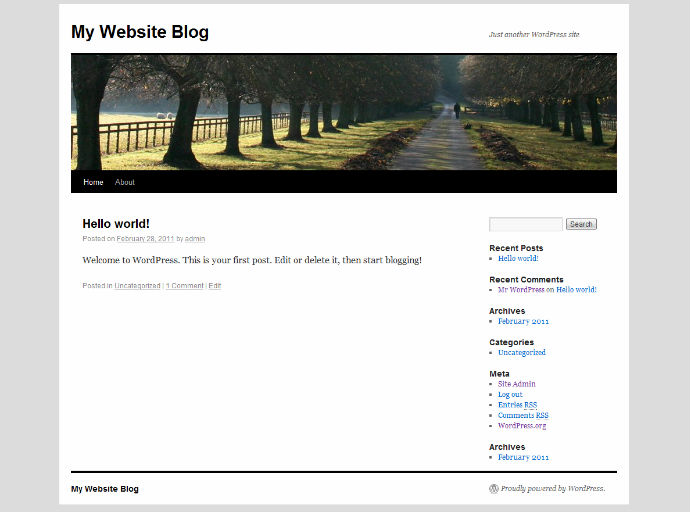
3. The next step consists in installing WordPress in a blog subdirectory of the site. I assume you know how to do this. If in doubt, refer to the official documentation. Once you’ve installed WordPress, the blog subdirectory will contain all the WordPress files including index.php whereas the sibling dummyblog subdirectory contains our non-WordPress dummyblog.html and dummyblog.css files. If you now access www.example.com/blog/index.php, you will see the WordPress blog with the default Twenty Ten theme:
Now the problem we are faced with is that we have a fully functional WordPress blog with the Twenty Ten look and feel (blog/index.php) and a dummy web page with a placeholder empty blog area (dummyblog/dummyblog.html). The task ahead consists in tweaking the WordPress theme in order to incorporate the HTML elements of dummyblog.html into the web page that the WordPress file index.php generates.
4. We now have to copy the WordPress default Twenty Ten theme. In order to do this, simply go to the example.com/blog/wp-content/themes/ directory and make a copy of the twentyten directory, renaming it as mywebsite.
5. In the new example.com/blog/wp-content/themes/mywebsite/ directory you will find a file style.css. Open it in a text editor.
6. Edit the comment at the top so as to replace the Twenty Ten name and description with your own:
/*
Theme Name: My Website Theme
Theme URI: http://www.example.com/
Description: A custom modification of the WordPress Twenty Ten theme.
(…)
7. Open the WordPress dashboard (www.example.com/blog/wp-admin/) and check that there is now a second theme in the Themes menu:
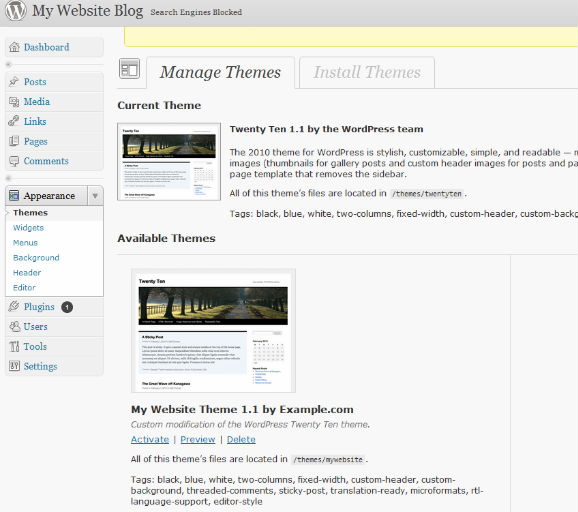
Note that WordPress uses the comment at the top of style.css to identify the name and description of the theme. If you want to have a different thumbnail image, you’ll just need to edit the screenshot.png file in the same directory.
8. Activate the new theme. The blog still looks the same since the new theme is just a copy of Twenty Ten. Now comes the fun part.
9. In the themes/mywebsite directory find the file header.php and open it in a text editor. This file contains the HTML head and the first part of the body.
10. In the head element, we need to merge those parts of the dummyblog.html file which are required for our site, such as links to JavaScript files and the favicon. In my test I added the highlighted text below:
<!DOCTYPE html>
<html <?php language_attributes(); ?>>
<head>
(…)
wp_head();
?>
<script src="../../../../../js/main.js"></script>
<link rel="icon" type="image/png" href="../../../../../images/favicon.png">
</head>
You might want to change the way the title is processed too, but the Twenty Ten code does some nifty things like adding page numbers, so it is probably better to leave it as it is.
11. We now continue editing the header.php file in order to modify the body part. You will find that the Twenty Ten theme has a div element of class wrapper inside the body element. That’s where we have to insert the HTML code. So, open dummyblog.html and copy all the HTML markup between <body> and <div class="my-website-blog-area">.
<body <?php body_class(); ?>>
(…)<-- Here goes all the HTML code between body and the my-website-blog-area div -->
<div class="my-website-blog-area">
<div id=”wrapper”>
12. Save the header.php file.
13. Now open the file footer.php in the text editor. This is the file that generates the final part of the HTML document.
14. In the dummyblog.html file copy the part from the closing </div> tag for the my-website-blog-area element up to the final closing </body> tag. In footer.php, paste the code just before the closing </body> tag:
wp_footer();
?>
</div> <!-- my-website-blog-area -->
(…)<-- Here goes all the HTML code between the closing tag for the my-website-blog-area div and the closing /body tag -->
</body>
15. Save footer.php.
16. Open the file style.css in a text editor together with dummyblog.css. Copy all the styles for your id and class selectors from dummyblog.css, and paste them at the end of the style.css file.
17. Save these changes and load your site www.example.com/blog/index.php. There will probably be some glitches with the styles. The things to watch out for are:
- Be careful with name clashes. If style.css uses a name (like
footer, for example) that your styling file also uses, you will have to use different names for those elements. - The other problem is that the WordPress file style.css and your dummyblog.css may specify different styles for HTML elements like body or p. In such cases you will have to apply those styles to the div elements that surround the non-WordPress part, and reset those styles in the
my-website-blog-areaclass. This may involve a bit of trial and error, but it should be relatively easy for anyone with a sound understanding of CSS. - If your placeholder blog area has a width similar to the one assumed by the Twenty Ten theme (980 pixels) there should be no problem with the width of the layout elements. In the test I wrote for the screenshots I had a go at a trickier case where the blog area is narrower than usual. In such cases, it is necessary to look for the various hard-coded width values in the style.css file that affect the central column (basically all those that are larger than 600), and subtract from them the difference between 980 and the actual number of available pixels. If we choose to keep the Twenty Ten header, we will also need to edit the functions.php file to reduce the hard-coded width of the header image, and crop the image file itself.
18. Finally you may want to get rid of the header and the footer of the default theme since your design probably has its own header and footer. In the Retibus Blog I have decided to delete the header part, but I have kept the default footer, which simply adds the name of the blog and the ‘Proudly powered by WordPress’ text.
3. References and further reading
When I first tried to do this I found surprisingly few relevant results when googling for expressions such as ‘embed WordPress into existing site’. Aside from the official documentation pages at wordpress.org, there are four interesting articles I found on the web that helped me to figure out how to do this:

Pingback: Adding WordPress Into Existing Webpage | Christopher Mack Blog